.png?height=120&name=Mindhive-Brandmark-BrownYellow%20(1).png)
Mindhive enables you to create a dedicated enterprise organisation space, perfect for businesses, teams, or communities that want a branded, collaborative environment for solving problems, sharing insights, and driving innovation.
This guide walks you through how to effectively set up your organisation, covering each field and option available on the "Create Your Organisation" page.
By creating your organisation page, you will be able to access admin tools to manage branding, visibility, and other user permissions. You can grow your network by managing members and collaborators.
Access the Create Organisation page here: http://web.mindhive.ai/organizations/create-organization
Step 1: Start the Organisation Setup
From your Mindhive dashboard, click the "Create Your Enterprise Org" link (top right corner of the home screen). This will open the "Create Your Organisation" setup page.

You'll need to complete the following fields:
- Organisation ID: This is your unique identifier, like a short handle or nickname. Keep it short and easy to remember. The ID will be used to generate URLs and internal references.
- Organisation Display Name: This is the full name displayed to your members. Choose a name that reflects your group’s identity or purpose.
- Organisation Logo: Adds branding to your organisation space. Upload a circular or square image of a high-contrast, recognizable logo so that your team can instantly identify your workspace.
Once these are filled out, click "Next" to continue.
Step 2: Choose a Subscription Plan
The next screen will show the Enterprise Subscription Options. Currently, only the Team Plan is available:

Team Plan - $28/month per user
Features
✅ All Free Plan features
✅ Custom logo and interface
✅ Invite users to your team or community
✅ Organisational management roles and permissions
✅ Advanced analytics and engagement tracking
✅ Discussion templates and category customization
✅ Online customer support
✅ Consistent ideation/problem-solving methods
✅ AI agent support for productivity and learning
Increment the number of users using the "+" button at the bottom. You will be billed based on the number of users added to your enterprise space.
Click "Subscribe" to finalise your plan and launch your organisation.
Step 3: Adding Users to Your Organisation
Now that your organisation is created and your subscription is active, you can now start adding members to your organisation.
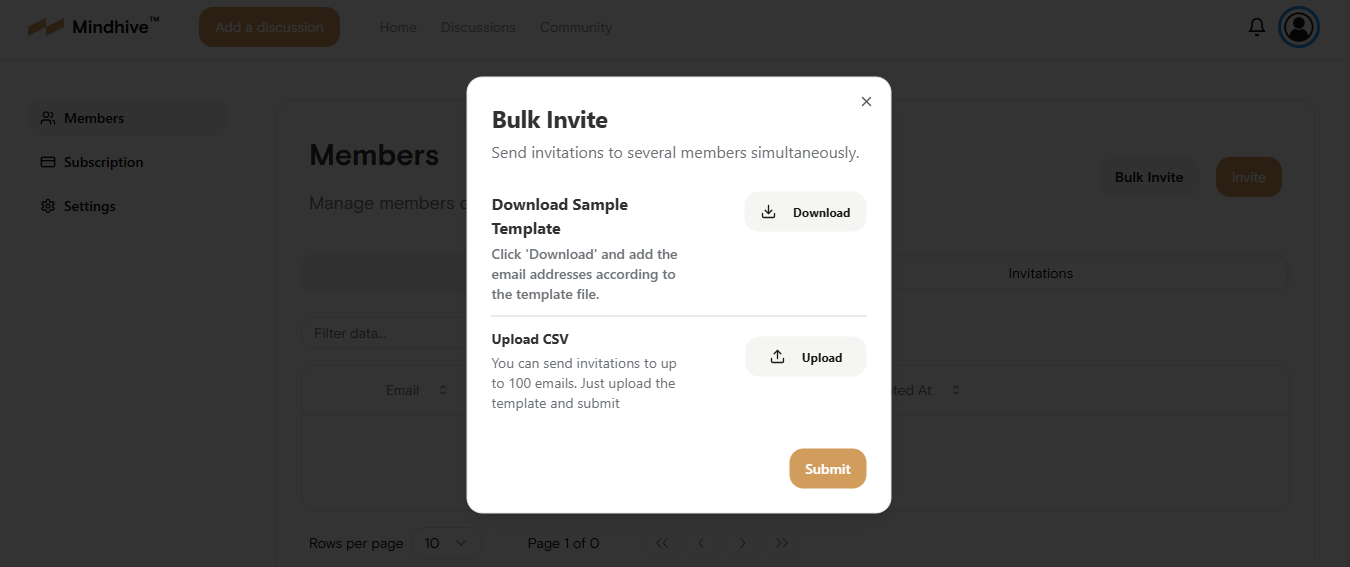
Go to the Members tab and add a user.

You can also invite users via email or through a custom invite link. For bulk invites, upload your contact list in CSV.

Assign them specific roles to any particular team member.
